Close up of two hands adhering an adhesive mesh patch to repair a hole in a tent's screen

Let Gear Hibernate: Tips for Off-Season TLC

The lack of long sunny days and campfire cookouts is taking a toll on all of us, and we’re pretty sure most of you would pick a blanket under the stars over a blanket of snow. We know that during these cold months it’s easy to stash your gear in a corner and forget about it until your next adventure. But, a little TLC during the off-season can make a world of difference! Proper care and maintenance means that your tent, sleeping bag and other essentials will be ready to go one you have that campsite booked. Let’s dive into some easy ways to keep your gear in tip-top shape.

Close-up of hand reaching into red fabric first aid kit to pull out a bandaid while seated outside

1. Re-stock your first aid kit.

We always recommend carrying a first aid kit on any outdoor adventure. Be one step ahead of those unexpected cuts and scrapes on the trails by making sure you're stocked up on these first aid kit staples before you head off to the trails.

  • Bandages
  • Cotton Gauze
  • Sterile Gauze Pads
  • Antiseptic Wipes
  • Medical Tape
  • Safety Pins

If you're just starting out and looking to gear up before spring, we've made it easy and have all the essentials picked out for you in our Trek I First Aid Kit.

Close up of two hands applying fabric glue to reapir a hole in an orange sleeping pad

2. Inspect your air mattress and/or sleeping pad for rips and holes.

It's good to get in the habit of inflating your sleeping pad or air mattress before leaving for your next trip. Believe us, there's nothing worse than waking up on the cold ground in the middle of the night.

Lay out your pad or mattress and begin to inflate it – if you're able to hear air leaking, grab some liquid soap and water to help find the source. Slowly submerge your gear in water, section by section, or wipe it down with soapy water. Gently apply pressure to the material and bubbles will start to form from where the leak is located. After finding the source, use your product's included repair kit, or trust Coghlan's Airstop and Vinyl Rubber and Repair Kit to get the job done. Now your sleep set-up is as ready as you are for that next adventure.

3. Repair new or worsening wear and tear in your tent.

We want to make sure that you're getting the most of out of your tent – it's a big investment and it should last more than a single summer! With the right supplies, you can easily repair damage to the fabric and poles to ensure that it can continue to withstand wildlife encounters or sudden weather changes. Taking the time now means you'll be ready to set up camp smoothly once the season begins.

  • Repair holes in mesh panels with our simple peel-and-stick Mesh Repair Patches.
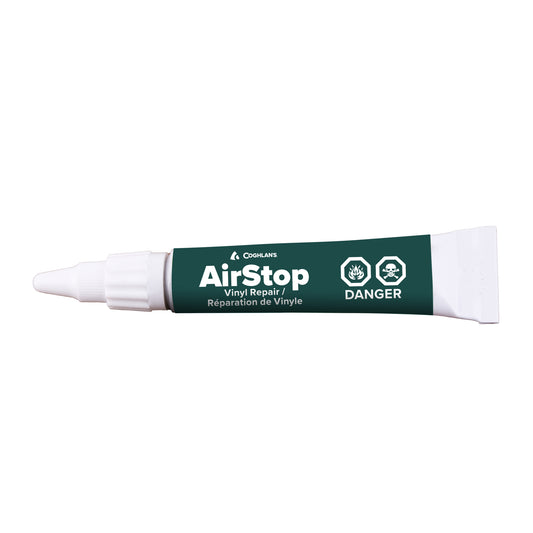
  • Cover holes in the fabric of your tent using cut-to-size Nylon Repair Tape.
  • Replace your tent pole shock cord. If you notice that your poles are lacking enough tension to snap together on their own, re-threading the shock cord is worth the effort. Refer to out Gear Guide for a step-by-step break down here.
  • Replace or repair your tent poles. Check for cracks, bends and splintering as these issues can worsen over time. For a quick repair, the Coghlan's Tent Pole Repair Kit easily assists with making repairs to fiberglass and aluminum tent poles. For a simple step-by-step breakdown to help you along, you can refer to our tent pole repair gear guide here.

Note: If you find your tent poles are beyond repair, consider ordering replacements from your tent's manufacturer to ensure compatibility.

Half of a cast iron camper cooker placed on a wire grill to be seasoned with oil

4. Re-season your cast iron cookware.

The process of re-seasoning your cast iron creates a protective layer that prevents rust and enhances the cast iron's non-stick qualities. You can repeat this process as needed for an improved use, but remember that effective seasoning is made by many thin layers.

  • Using a paper towel, rub the cast iron with a thin film of neutral oil, such as canola or vegetable. This includes the bottom as well as any handles.
  • Wipe away excess oil until it feels dry to the touch.
  • Place the cast iron upside down in the oven and bake at 350°F for one hour. Line a baking sheet with aluminum foil and place it underneath to catch any oil that may drip.
  • After one hour, turn the oven off and let the cast iron cool inside.
  • Repeat as needed.

Note: Coghlan's cast iron products come pre-seasoned, but with an unseasoned cast iron you will get the best results out of your product by repeating these steps until a smooth finish has developed.

For routine cleanings, avoid using abrasive materials to better preserve the seasoning. When it's comes to stubborn burnt-on food and grease, Coghlan's Cast Iron Cleaning Kit tackles those difficult messes with ease. The durable chainmail scrubber and dual-side washcloth will ensure your cast iron is well-maintained and ready for future cookouts.

5. Sharpen your camp knives.

Ensuring that you are properly maintaining the blade of your pocket knife not only preserves it's longevity, but also protects the user from any unexpected slips or cuts, and as we all know: a sharp knife is a safe knife. All you need is durable, sharpener with multiple grits to revive your knives. The Coghlan's Sharpening Stone, a compact, 120-grit and 400-grit surface, makes sharpening a breeze. Hold your blade at a 20° angle and slide it across the stone in smooth, even strokes on both sides until it's sharp. After sharpening, applying a light coat of oil to the blade can help reduce friction and prevent corrosion in the future – making it a trusty tool for years to come.

Bonfires, early morning dips in the lake and fresh camp coffee are almost in reach! Your future self will thank you for taking the time to maintenance your gear and save you from any disappointment or unexpected surprises upon setting up camp. Investing in the proper tools and repair kits that can be used for both in-field repairs and permanent at-home repairs can turn a trip-ruiner into a quick fix. A little more prep now means less stress later, and will ensure that you’re always prepared for those less-than-ideal incidents, no matter where your adventure takes you.